

 These days it seems like waiting around every corner there’s a profound and thought provoking new perspective anxiously coiled in anticipation for that bright, illuminating moment when our respective smartphones and tablets spring to life. Poised and ready, these new views seek to challenge us to think different and re-evaluate this thing called life and the vast and inexhaustible mysteries of the human experience.
It’s during times like these that I find myself drawn back to days gone by; to nobler times when the genteel overruled the grotesque and when dignity and propriety were the order of the day. It is from these revered times that I draw the sentiment which so aptly describes how I feel about this particular recipe. It is in the immortal words of the seminal and enduringly timeless rock band Warrant that I find my truth:
She’s my cherry pie, cool drink of water, such a sweet surprise. Tastes so good make a grown man cry….Sweet cherry pie, oh yea…
In all seriousness though, I spent a number of my younger years in the “valentine’s haters” club. Over the past 16 years of marriage, motherhood, working, sickness, recovery, life etc etc, I’ve realized that there are a whole lot of things out there that legitimately deserve to be on my ‘dislike’ list; and at the end of the day…..a holiday that celebrates love and appreciation for the people in my life just isn’t one of those things.
And amazingly enough, once I let go of that particular bias, I found that my love of Valentine’s day and everything surrounding it has just grown and grown with each passing February. So now I make no apologies for throwing my heart and soul into celebrating it each year. Mind you, I don’t think shimmery balloons, teddy bears and cheap chocolates are ever a suitable demonstration of your feelings (unless you count that one year that I completely filled Ben’s office with them while he was away at lunch….but that was different), however….I do believe that there is no greater time of year to throw yourself into extravagant, indulgent, luxurious desserts. I mean honestly….”love” always gets a pass right?! And so, in the name of love, I give you this year’s offering……

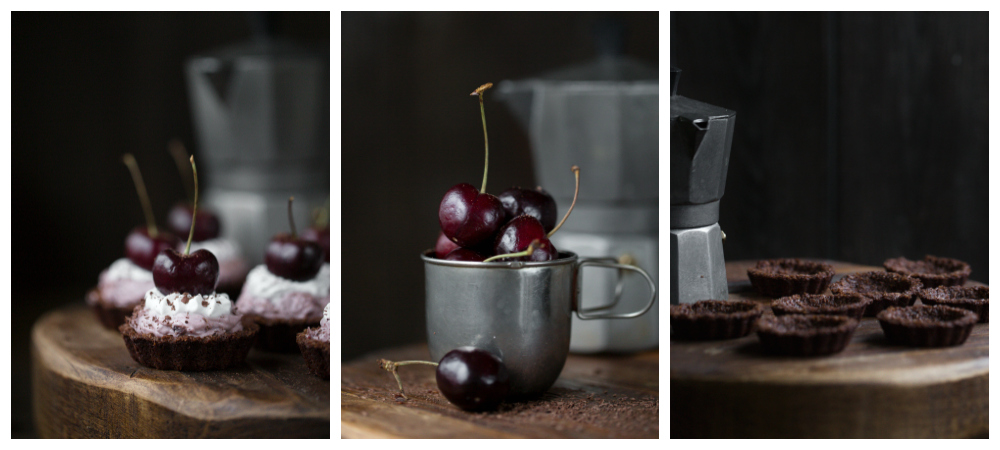
Cherry Cream Pies w/Chocolate Crusts
Makes 12 mini tarts
Ingredients:
Chocolate Macaroon Crust
1 1/2 cups unsweetened extra fine-shredded coconut*
3 tablespoons cocoa powder
Pinch of salt
3 tablespoons coconut oil
3 tablespoons honey
1 teaspoon vanilla extract
1 tablespoon full fat coconut milk
*I recommend Let’s Do Organic coconut for my recipes
Cherry Cream Filling:
1/2 cup (about one cans worth) of cold coconut cream, like found at the top of a chilled can of coconut milk.
4-5 tablespoons cherry jam (store bought or see recipe below**)
added sweetener if needed
Whipped Cream Topping:
1/2 cup of cold coconut whip cream (as seen above)
Honey or maple syrup if desired, sweeten to taste (1 tablespoon is usually good)
Shaved bittersweet chocolate and/or whole cherries to garnish
Method: (All components can be made ahead of time and assembled when desired.)
For the crust:
Makes 12 mini (2 1/2 inch) tartlets, 4 small (3 1/2 inch) tart shells
Preheat the oven to 345 degrees. Lightly grease your tart pan then combine all the ingredients in a medium sized bowl. Mix well.
Press the macaroon dough evenly into the tart pans. About 1 rounded tablespoon per mini tart or 3 level tablespoons for the four small shells. Take your time pressing the dough firmly into the pan and shaping the sides for best results. If your house is super warm, chill the unbaked tart shells in the freezer for a few minutes.
Bake the mini shells for about 15 minutes (times will vary from oven to oven and size of pan). Check them half way through. Gently press down the center of each tart if it is rounding up, rotate the pan and continue to bake till done. They should be firm to the touch. Let cool completely in the pan or they will break apart. They will be much stronger once cooled.
For the Cherry Chiffon Cream:
Transfer the cold coconut cream to your standing mixer bowl (or medium sized bowl if using a hand mixer) and beat on high until thick and fluffy. This can take longer with a hand mixer. Slow the mixer as you add the jam one tablespoon at a time. Increase the speed to high again and beat the mixture for a few more minutes to get the lightest, most airy cream possible. You want the cherry cream to have the texture of softly whipped cream.
Clean the beaters and bowl to remove any residual cherry cream, then beat the rest of the coconut cream with the optional sweetener. Beat till light and airy.
(Note: If your cold coconut cream is not smooth and silky right from the can, it will not make a smooth and creamy whipped cream. Sometimes it takes a few brand try’s to find the one that works best for you. Brands with guar gum in them, work the best. My preferred brand is the 365 Whole Foods one.)
Assembling the tarts:
Carefully remove the cooled tart shells from the pan, I usually place a cookie sheet on top of the mini tart pan and flip the shells out onto the sheet. Sometimes they require a little tap to get them all out. Be gentle as the tart shell edges can be fragile.
Scoop mounds of the cherry cream into each tart. Using a piping bag fitted with a star tip (or whatever tip you like), pipe a small amount of plain coconut cream on top of the cherry cream. Garnish with shaved bittersweet chocolate and a whole cherry. Serve right away or chill for later use.
For the Cherry Jam**
(make a few hours to 3 days in advance)
Ingredients:
1 pound fresh or frozen pitted cherries
1/4 cup Madeira wine or water
1/3 cup honey or maple syrup (more if desired)
1 tablespoon lemon juice
Directions for making the jam: Gently pulse the cherries in a blender or food processor. Do not puree them, just pulse until the cherries are coarsely ground, leaving some large pieces for texture.Transfer cherries and the rest of the ingredients to a small sauce pan, then bring to a simmer. Cook until the liquid starts to thicken, 20-35 minutes. Stir often toward the end, pulling the spoon across the pan. You’ll know it’s about done when you pull the spoon through the jam and it takes a second for the juices to fill the space back in.
Remove from heat and allow to cool completely, then chill. The jam will continue to thicken as it cools.


OMG!! Everything about this is absolute perfection. Amazing recipe with the most gorgeous photos ever!! You are on fire, lady!
These look amazing, and with relatively simple ingredients too. I may have to make these soon! 🙂
oh my heavens these look perfect!
These look incredible! And definitely a more appropriate way of showing affection than teddy bears that you don't really want to keep, but throwing out seems wrong…as a result, the dog usually has a pretty happy Valentine's as I "accidentally" leave them in her bed 🙂
oh. mygosh. These look delicious. So much better than sparkly balloons and a box of sugar chocolate
I know I'm in the right place when you're quoting a Warrant song !!!
What a wonderful idea; these look amazing!
Wow! These look so good! I love the fresh cherry on top! Thank you for sharing! I love it that all your recipes are gluten free and dairy free. I just went diary free a few months ago and always look forward to trying your recipes!
Is your book going to be available only to Kickstarter backers?
No, we are with a publisher now and it will be distributed worldwide and be in stores like Barnes and Noble and maybe Williams Sonoma.
Awesome, can't wait! Your ig pics are amazing 🙂
Oh my good gosh your photos are beautiful!!!! These are beauteous.
Do you have any plans to update the Kickstarter with status at all?
We've sent out quite a few news updates. You might want to double check that the email you listed is correct or
That the emails aren't going to your junk mail. There should be another one coming out in the next few weeks with an update in the cover and title. So be looking for it!
Can't wait to try some of these recipes!
Do you think it would make a whole 10″ tart? That’s the smallest I have and it’s so much easier for feeding the family. Maybe if I made1.5 or 2x the recipe? Thanks!
Hmmm yes it may make that size. You can always add a half recipe to it to be safe.
Yes, I know lots of people who say they do this!
Just made these this evening for a girls night and they were WONDERFUL!! I did need to put the crusts In foil muffin linerS because my first batch would not come out of the tiN. It worked out well because they turned out to be handy lil’ serving vessels for an informaL night “in.”
Thank you! it was delicious!
i am in love with your recipeS! I own your book, paleo patisserie, and am slowly making my through the book – and loving everything I try. Last night for a dinner party, I made your pear-almond frangipane tart and it was fantastic! Everyone raved. The only change I made was to mix it up and switch out the chocolate crust for your shortbread crust, and I poached the pears in some maple/honey/water/vanilla bean beforehand. I also sprinkled slivered almonds on top before baking. Thank you so much for making “patisserie” so accessible for us! I am truly inspired by you, your stories, your recipes, etc! This chocolate cherry combo looks incredible too – as do all the other combos in your book. I’m already looking forward to my next recipe adventure in your book….
Your version sounds amazing!